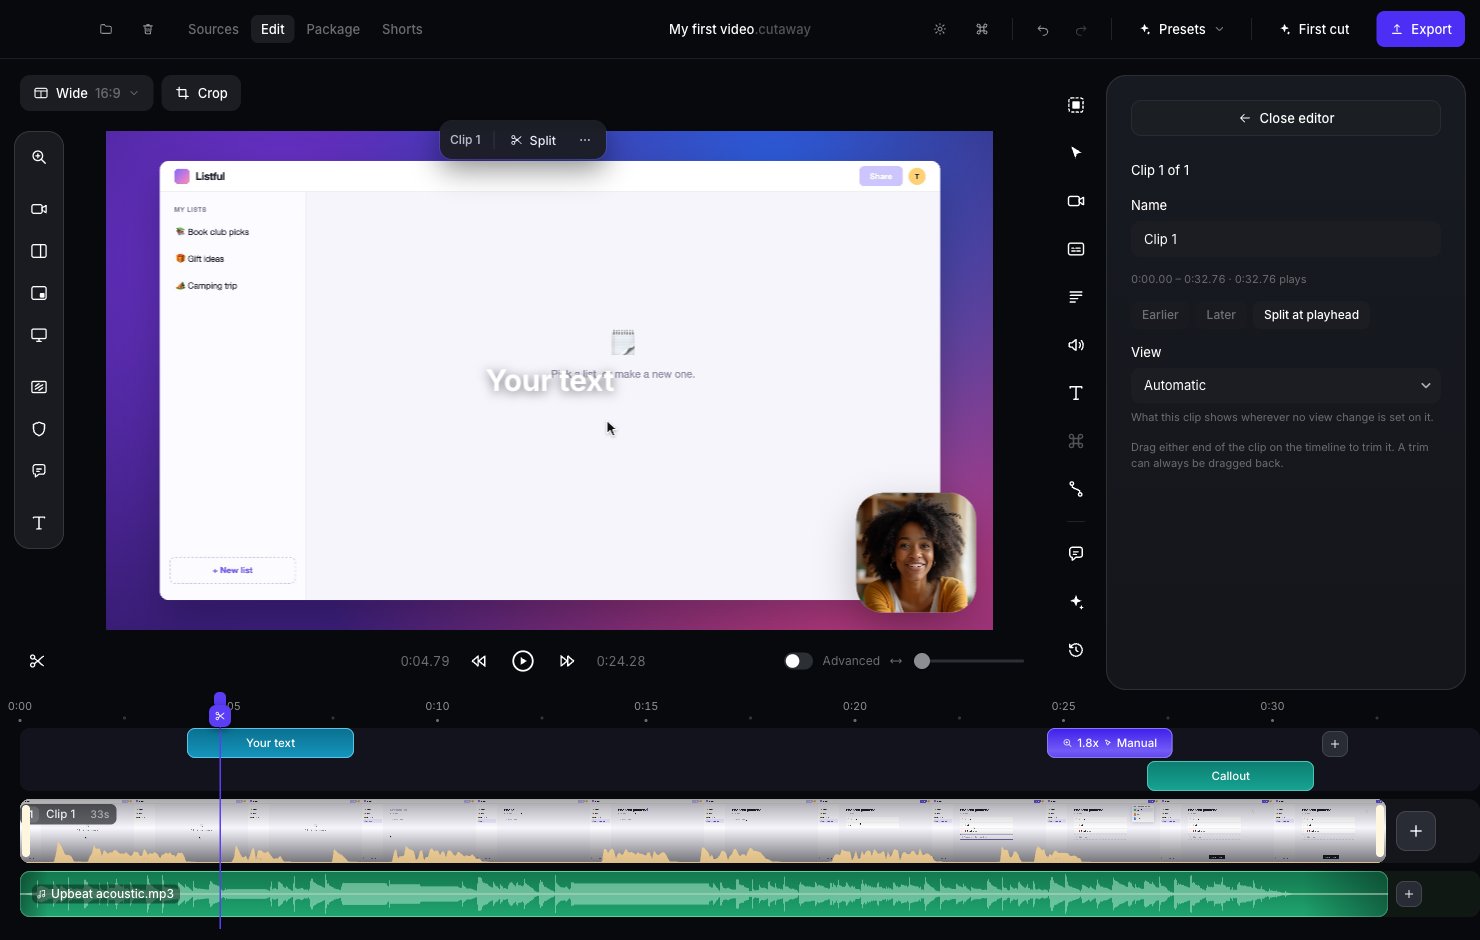
- Text and effects: text, zooms and callouts you’ve added.
- Video: your clips. The wavy line is the sound of your voice.
- Audio: music and sound effects.
Move around
- Click anywhere on the timeline to jump there. The purple playhead line moves to that spot.
- Press Space to play or pause.
- Press ← or → to move one frame. Hold Shift to move one second.
- Use the zoom slider to the right of the play controls to see more detail on the timeline.
- Small flags on the ruler mark moments you flagged while recording. Click one to jump there, or press [ and ] to go to the previous or next flag.
Cut out a part
1
Mark the start
Move the playhead to where the part you don’t want begins. Press I.
2
Mark the end
Move the playhead to where it ends. Press O.
3
Cut it
Press X, or click the scissors button next to the play controls.
Split a clip
Splitting chops one clip into two pieces, so you can move or remove one of them. Move the playhead to where you want to split and press S (or Command + B). You can also click the small scissors on the playhead.Trim a clip
Click a clip to select it. Then drag its left or right edge to make it shorter. Drag it back out to undo the trim.Reorder and remove clips
- Reorder: drag a clip left or right.
- Remove: select a clip and press Backspace. Removed clips can be put back.
The clip panel
Click a clip to open its panel on the right. Here you can:- give the clip a Name,
- press Earlier or Later to move it one place in the order (or press ⌥← / ⌥→),
- press Split at playhead,
- pick a View: what the clip shows, such as Screen only or Camera only. Automatic lets Cutaway choose.
Add more video or photos
Press the + at the end of the video row, then choose Video or photo from my files… and pick files from your Mac. A photo becomes a clip of its own. It shows for 5 seconds at first. To change how long it shows:- click the photo clip, press Length in the bar above the preview, and drag Shown for, or
- drag the right edge of the photo clip on the timeline.
Select a stretch of the timeline
Drag across the video row to select a stretch of time. You can also press I at the start and O at the end. Double-click the footage to select the part between two cuts. The panel on the right then shows what you can do with that stretch:- Cut: remove it. Restore brings back any parts already cut inside it.
- Keep as is (or press L): AI changes will leave this part alone.
- Speed: play this part at 0.5×, 1×, 1.5×, 2× or 4×. Your captions follow the new speed.
- Show here: pick what shows in this part, such as Screen only, Screen + camera, Camera or Split.
- Add: put a Zoom, Text, Callout, Section card, Lower third or Mask over this part.
- Ask for a change here: describe a change in your own words, like “Less movement in this section”, and press Preview the change.
Work with several blocks at once
Hold Shift or Command and click blocks on the timeline to select more than one. Click a block again the same way to take it out. With blocks selected you can:- drag one to move them all,
- press ⌥← or ⌥→ to nudge them one frame (add Shift for one second),
- Copy them (Command + C) and Paste at the playhead (Command + V),
- Duplicate them (Command + D),
- Remove all of them (or press Backspace).
Snapping
When you drag a block, its edges snap to useful spots: the playhead, clip changes, flags and the edges of other blocks. A thin line shows where it snapped. Hold Option while you drag to turn snapping off.Transitions
A transition is a smooth change from one clip to the next, instead of a sudden jump. You need two or more clips for this. Click the small button where two clips meet on the timeline, then choose Cross-dissolve (one blends into the other), Dip to black or Dip to white. Hard cut means no transition.- Length: drag to make the transition shorter or longer.
- Use on every clip change: in the clip panel, copies this transition to every place where two clips meet.
- Remove all: in the clip panel, turns every transition back into a hard cut.
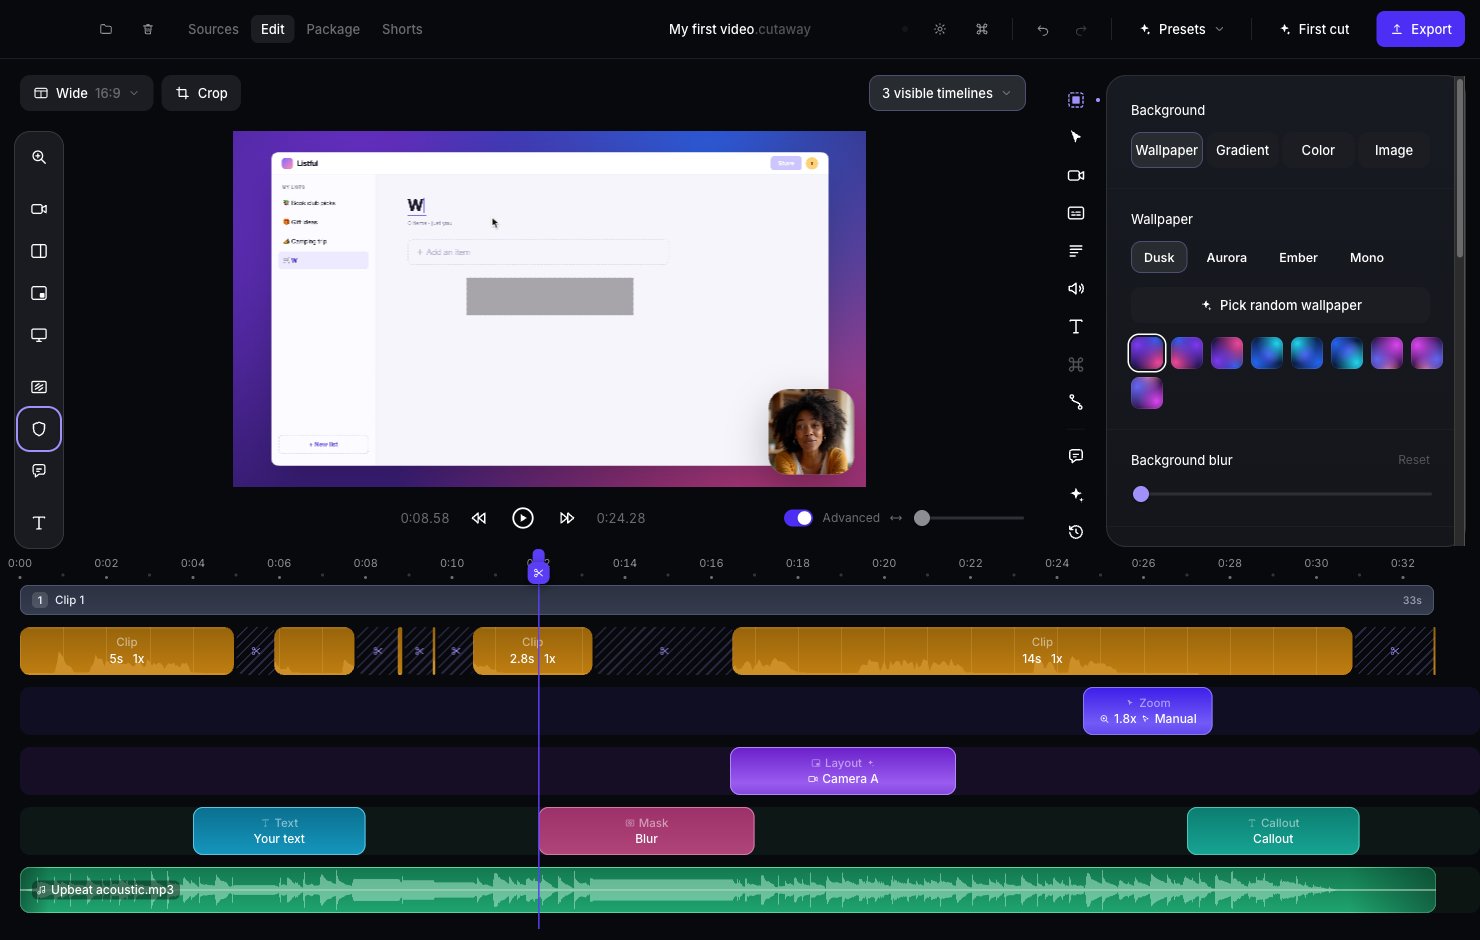
Simple and Advanced timeline
Next to the play controls is an Advanced switch. The simple timeline shows three rows: text and effects, video, and audio. Turn Advanced on to see every layer on its own row, such as views, masks, speed changes and sound effects. A button above the preview then lets you pick 1 visible timeline or 3 visible timelines (or press Command + T).